I’ve had a few emails (so soon!) asking how I created my version of the star posters in an earlier article. I created mine using Photoshop vectors (out of habit) but Illustrator, or indeed any app that supports vectors, would be fine — just adapt the processes to your app.
So, without further ado…
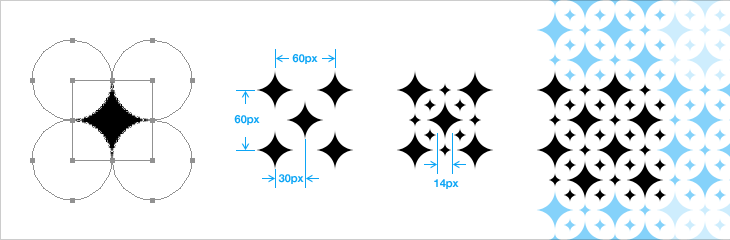
You need to create two sizes of star. Mark Brooks used an additional star shape that was an outline, so you can create one of those as well if you want. The simplest way is to draw a square (mine was 40px × 40px) then create four circles of the same dimensions, offset them to the corners, then set them to subtract from the square, like above. I normally expand the shapes just to leave a nice clean star. Then it’s a process of duplicating and offsetting, like above. Create the large stars on one layer, and the small ones on another.

Keep going until you’ve filled whatever size you need.
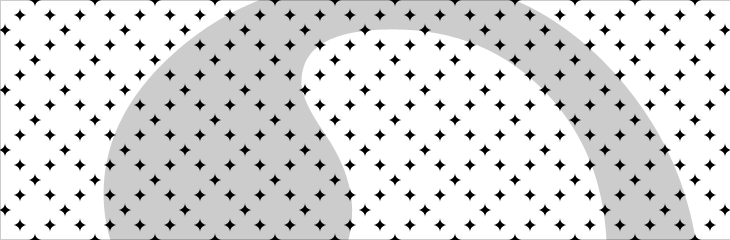
Then, turn off the layer with the big stars and create a new one with your shape on it. If you’re using a photo, posterise it into black and white using whatever method you prefer, then put it below all the other layers — fiddle with the opacity so it doesn’t hurt your eyes.
Then it’s quite simple. Delete all the small stars that aren’t mostly on the black areas of your shape — zoom out now and again if unsure and use your judgement.
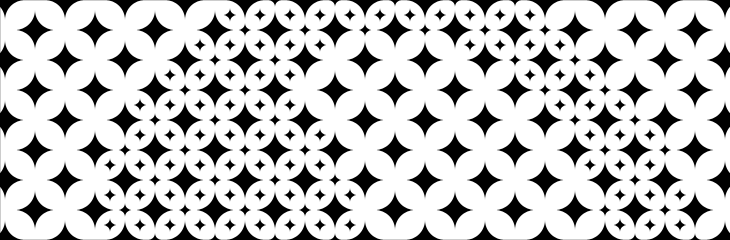
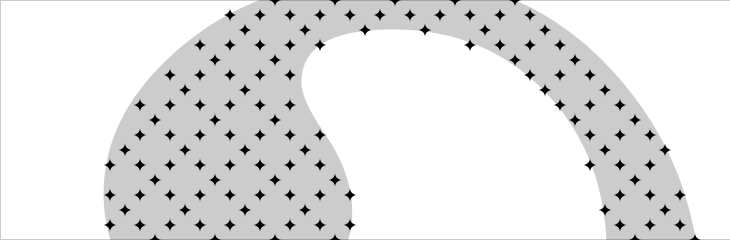
Then turn the other layer back on, and turn off or delete the one with your shape on it. You’ll end up with two layers - one completely covered in a pattern of big stars, and another with a pattern of small stars on the area of your shape. Print, and savour.
Of course there are tools available to simplify the process of creating patterns from images, and some of them seem to be good. However, I’m rather more than a bit obsessive about the fine details, and something like this really needs accuracy — doing it manually means I can make sure it’s just right.